Guessing Game

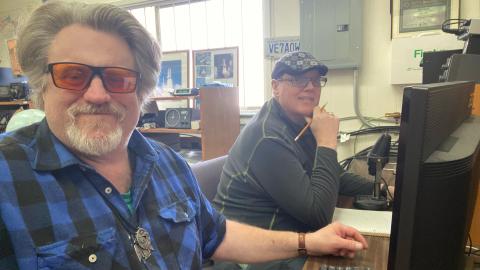
Can you guess who this member is?

Can you guess who this member is?
The Peachland repeater was updated today. A small team went out in the rain and installed the new Kenwood repeater. Over 40 hours of volunteer work was involved in this repeater repalcement.
The next repeater on the list is the Orchard repeater.
Morse Code Day is celebrated annually on April 27th to commemorate the birthday of Samuel Morse, the inventor of Morse code. This day recognizes the significance of this communication system, which was a precursor to many modern technologies.
The Nanaimo Amateur Radio Association is seeking your help to advertise our radio propagation tests on Saturday May 31, 2025.
In 2023 NARA carried out some practically based NVIS (Near Vertical Incident Skywave) propagation tests. During daylight the D-Layer forms and on the lower frequency bands the D-Layer attenuates signals thus reducing ranges. A stark example of the D-later attenuation is that Medium Wave broadcast signal from a distance can not be heard during daylight. When the D-layer disappears at night longer distance AM broadcast signals can easily be heard.
NARA wants to carry out daylight NVIS tests on the 80m, 60m and 40m bands using a transmitter power of 100 Watts. This simulates an amateur radio station at an emergency center during daylight hours. The purpose of the tests will be to see, in practice, what ranges might be
available.
While the exact frequencies have not yet been established NARA proposes to use the following frequencies: 3.720 MHz (LSB), 5346.5 MHz (USB) and 7.120 MHz (LSB). Note that these frequencies will be ‘dial’ frequencies. The frequency to which you set your dial (display) on your radio. Note that the convention on the 60m band is USB.
The date for these NVIS tests will be Saturday May 31 between the times of 11am to 3pm Pacific time. NARA will be using the callsign VE7NA and will be looking for as many check-ins an possible during this 4 hour test period. NARA would appreciate it if you could inform your members of these tests.
Please make a note of the date in your diary. NARA will supply further information nearer the test date.
73 de Nanaimo Amateur Radio Association
Nanaimo, Vancouver Island, BC

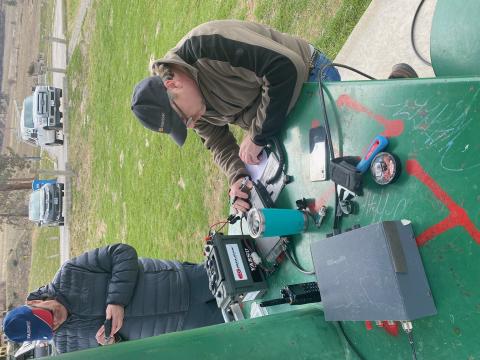
A few members were trying Parks On The Air at Cedar Creek park overlooking Okanagan Lake.
Kevin, Steve and Mike had a great day on the radio.
(I know the image is rotated, system issue)
The Pacific Forest Rally is back in Merritt!!!
After a number of years off due to Covid and natural disasters, PFR ran again in 2024 and was a huge success thanks to all the volunteers who came together to make the event possible! We are now looking for volunteers to help us run PFR 2025.
While a lot of work and planning goes into organizing a stage rally, some details can not be decided till the very end of the planning process.
That being said, here is what the tentative plan looks like at the moment:
Thursday May 29: set up and possibly tech and recce
Friday May 30: tech and recce and possibly couple of stages
Saturday May 31: stages stages stages
Sunday June 1: clean up
Amateur Radio operators are integral for the safety of a rally event. The event will not be possible without the support of the local Radio community. Please consider coming out to Merritt this May and helping out.
Amateur Radio operators are needed for various duties during stages, mainly road blocking and time controls. So the greatest need for radio operators is on Friday night and Saturday. Friday stages might run from about 5pm, and Saturday will likely run from 8am to 8pm. This means volunteers will need to be in place about an hour and half earlier. And of course if you have time and want to join the fun early on it will be greatly appreciated.
PRF organizers will provide lodging or partial lodging reimbursement and Saturday lunch. The plan is to have a volunteer appreciation banquet after the event Saturday night.
Please fill in the form (link below) to register as a volunteer. There is still a couple of months till the event, but we will be in touch every couple weeks to keep all the volunteers in the loop.
https://forms.gle/XK5xmb3sARRh6CaN6
Hope to see you at PFR.
Polina Sergeyenko on behalf of the Pacific Forest Rally team.
VA7 POL
She / her
P.S. Please feel free to contact me via rally.volunteer@rallyinterior.ca in case you have any questions.
Sunday March 16
9am to 2 pm
Free Admission
Venders contact Scott, free, bring your own table
ve7jke @ gmail.com
Location: 105 Martin St entrance via Estabrook Ave
PACE Penticton and Area Cooperative Enterprises E-Waste Centre & Computer Sales

The “Orchard City Amateur Radio Club” participated in this years “Winter Field Day” I few members came out to test their contesting skills.
The 20, 15, and 10m where active!
Thanks to all who helped in the setup and manning the stations.
One of the newest contest from ARRL is the winter field day. Like the original Field day, it shares many of the same rules and challenges but held in January.
This year it falls on January 25th and 26th. We plan to get our feet wet by holding it at our Chute Lake shack.
We will commence at 11:00 am Saturday local time until 2:00 pm Sunday. Operators and loggers needed. No experience necessary.
Depending on the outcome it may be worth while setting up in the field for next year.
Hope to see you there.
Any questions, call or drop me a note.
778 392-5696. ve7mvf@yahoo.ca
73
Mike (ve7fi)
Hello. Rebecca VA7BEC here, contest coordinator for the British Columbia QSO Party presented by Orca DX and Contest Club.
I hope 2025 has started off on a good note. May it be a happy, healthy and memorable-for-all-the-right-reasons year for you and yours.
This email is an early reminder about the 2025 running of the British Columbia QSO Party. I realize the email has TLDR (too long, didn’t read) potential, but it contains useful info — updates for regular participants in BCQP and hints and links for beginners.
BC operators are truly the life of the party. BC stations can have QSOs with anyone anywhere. We are in the spotlight.
The more BC stations on the air, calling “CQ BCQP”, the more opportunities there will be for QSOs with operators within BC and beyond.
Please forward this email to members of your club. A one-page invitation attached as well, if you wish to post it on your website.
BCQP 2025
February 1, local time, 8am to 8pm AND February 2, local time, 8am to 4pm
(That’s UTC 1600z Feb 1 to 0359z Feb 2, and 1600z to 2359z Feb 2)
The most important thing to know is the date and time of the 2025 event: Two blocks over the Feb 1-2 weekend. That’s the first weekend in February.
Rules, tools, FAQ, in-depth event analysis/reports and scores from past years, examples of the lovely photo-based certificates and plaques... all available or viewing from links on the BCQP page of the Orca DXCC website. Go to http://www.orcadxcc.org/bcqp.html and click on the appropriate link in the menu on the left side of the page.
Updates for 2025
1. Expanded certificate program for BC stations
The chance to capture a lovely photo-based certificate is higher than ever! Certificates recognize top scores in all classes of entry in each federal lectoral district in BC.
2. Announced operations
I’m putting together a list of announced operations again this year. This should raise awareness of activity in BC and help operators near and far find you, as they will be better able to align antenna direction with your district and know to listen for you.
If you plan to be on the air and want to be on this list, send me the callsign you will be using, the mode(s) you plan to work, and the federal electoral district that you will be activating.
The list will be posted somewhere on the BCQP site. I will send out an email with a link at the end of January, so if you want to be on the list, let me know by Jan 27.
3. Rally
The rally idea worked really well in 2024, and we’ll do it again in 2025. Last hour of Saturday segment. This creates a concentration of CQers and stations looking for BC
Rally Schedule
80m CW at 0315z
160m CW and SSB at 0330z
75m SSB at 0345z
4. BC multipliers: Federal electoral districts — NO CHANGE from last year
The electoral map was recently redrawn to reflect changing population numbers across Canada and, with predictions of an early federal election, I expected new district names to be in place and the respective abbreviations for BCQP purposes to be used in BCQP 2025. I even prepared a new multiplier list. However, no election has been called and, according to Elections Canada, the new electoral map won’t actually go into effect until an election is called. So for BCQP 2025, we will use the existing electoral map.
*PDF maps: https://orcadxcc.org/content/pdf/electoral_areas.pdf
Confirm your federal electoral district here: https://www.elections.ca/home.aspx
In the center of the page, you’ll see Voter Information Service.Type in your postal code or the postal code of the place closest to where you plan to operate if not at home.
5. Log uploader — IMPORTANT!!
Given the increasing popularity of BCQP and a sustained high number of submitted logs above 300 over the past few years, we will be asking participants to upload logs electronically to a special portal in 2025. Check the rules for the log uploader address and associated details.
Read on for some helpful hints
Bands and time of day
BCQP is one of very few regular events — maybe THE ONLY ONE — that puts BC in a spotlight. In this party, BC stations can contact anyone anywhere, including other BC stations, while stations outside BC are on the hunt for you. Calling "CQ BCQP" will definitely attract attention even when band conditions are terrible. Just keep in mind time of day — daytime is better for the high bands (particularly 20m, 15m) and evening is better for the low bands (80m, 40m) — and antenna direction.
Concurrent events
In recent years, a factor that has spurred greater interest in BCQP from outside the province is the State QSO Party Challenge.
Details at http://stateqsoparty.com/
This competition is separate from BCQP but the organizer has included BCQP in the list of official events.
The SQP Challenge continues to be extremely popular with QSO party enthusiasts, fuelling wider attention for all QSO parties. But a fantastic advantage for us in BC is that the challenge kicks off on BCQP weekend, with BCQP as well as the Minnesota QSO Party and the Vermont QSO Party. This means a lot of stateside operators will be looking to maximize QSO opportunities across all three parties.
BC operators should absolutely take advantage of SQP Challenge interest to call “CQ BCQP” and maximize QSO potential. Remember to identify “BCQP” or “British Columbia QSO Party” so other operators know which party you are in. This will make exchanging information smoother. Also remember the stations in Minnesota and Vermont may want to trade a QSO. If you are calling CQ and someone in a different event calls and gives you an exchange that is incompatible with BCQP, work the stations for BCQP points first, enter the required information so it’s in your BCQP log, and then give the other operator what is needed for the other event. Usually your name or “BC”.
It can be confusing with different QSO parties happening at the same time. Use the handy same-weekend schedule (http://orcadxcc.org/content/pdf/2025_sked.pdf) to help you prepare the necessary exchange info.
If you have a question, I’m just an email away.
73,
Rebecca VA7BEC
Contest Coordinator for BCQP, Orca DXCC